Astrophotography with a Nikon D5300
Pretty starscape photos do not require pricy equipment and accessories. An entry-level DSLR, a tripod and two lenses, a wide and a tele, will do a fine job for rewarding constellation photos. As the night sky is (ideally) dark, we will need extended exposure times of up to 30 seconds and high sensitivity settings, depending on sky quality and on which lens type we are using. Although camera sensors vary in specifications, the following explanations largely apply to all DSLR cameras.
Respect and admiration for all camera manufacturers developing these little boxes jam-packed with hi-tech including hardware, firmware and of course lenses and fine mechanisms as well as product and technical documentation.
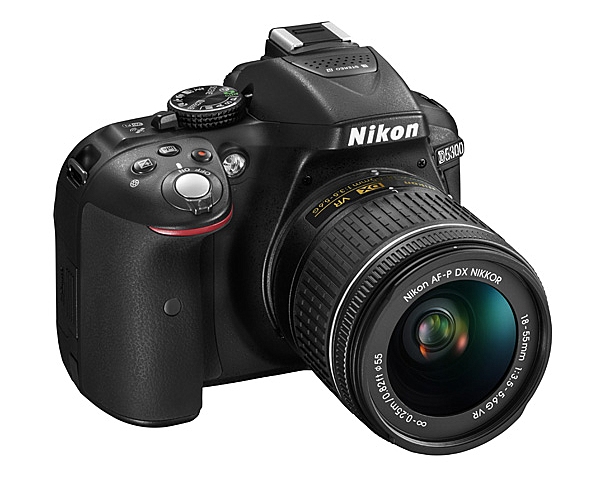
Workhorse
The Nikon D5300 is a handy, light-weight and entry-level DSLR camera containing a APS-C sized 23.5 x 15.6 mm (6000 x 4000 pixels, 3.92 microns pitch, crop factor 1.5x) Sony CMOS sensor. Nikon calls it the DX-format while its larger FX-format sensor measures 36x24mm which is nearly the same size as 35mm film (full frame). With selectable exposure times up to 30 seconds in manual mode, alternatively bulb and time, the D5300, too, is ideal for capturing of skyscapes and constellations in connection with a bright (fast) lens.
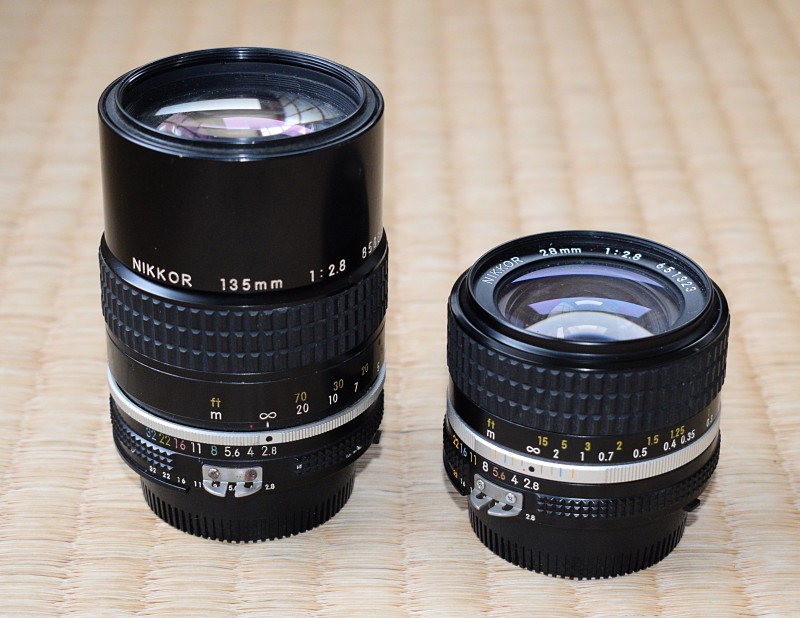
Equipment
A 'bright' lens is one with an f-number of 2.8 or less. The elder Nikkor 28mm and 135mm f2.8 lenses are not compatible with the D5300 controls, however, this is irrevelant since we are working in manual mode for astro-photography. Else required is a sturdy tripod, preferably with a ballhead.
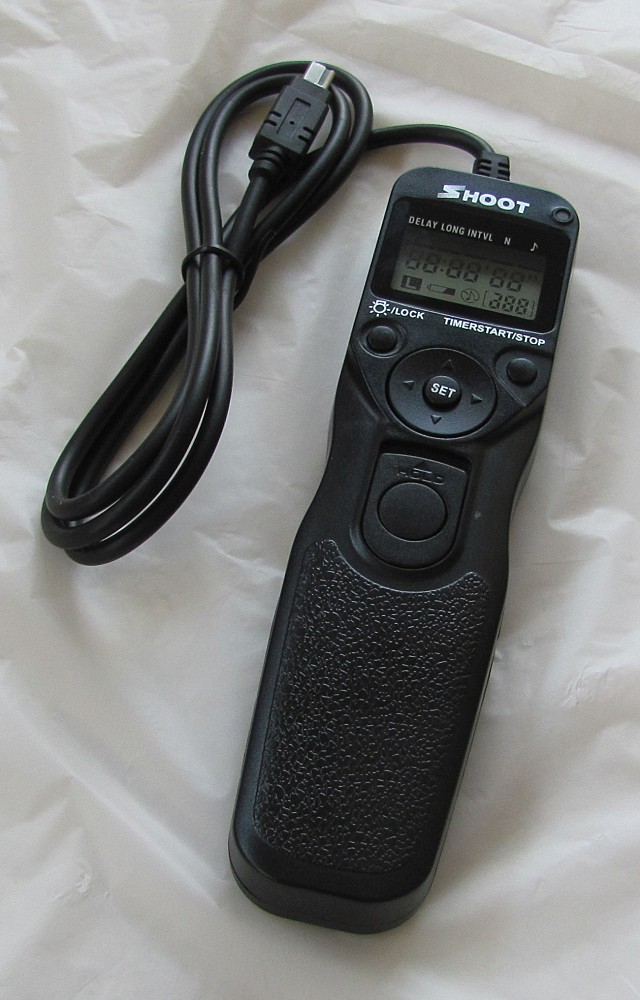
Remote Control
Nikon provides a 'Wireless Mobile Utility' app which connects to the D5300 via its WiFi for remotely viewing and shooting photos which also works flawlessly in Bulb mode. Also designed for use in manual bulb mode, a programmable remote timer which is partcularly useful when exposure times over 30 seconds are needed. For remote control via a desktop, "digiCamControl" is a fine choice.
Location
No detailed explanation required, the best location for rewarding astrophotography is a dark, steady sky in absence of artificial and natural illumination, the latter including the Moon. Most of us will have to move miles and miles for such a place. If out of reach, try your suburbs for training and use a lens hood and a light pollution filter.
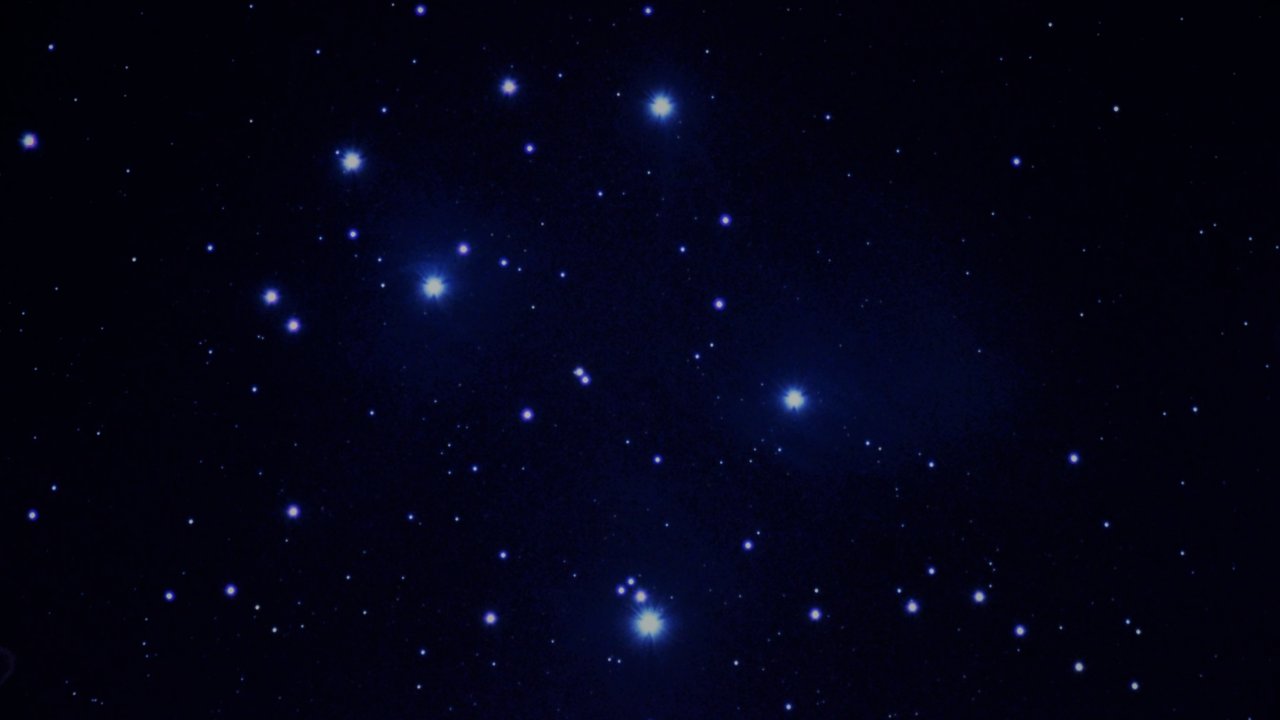
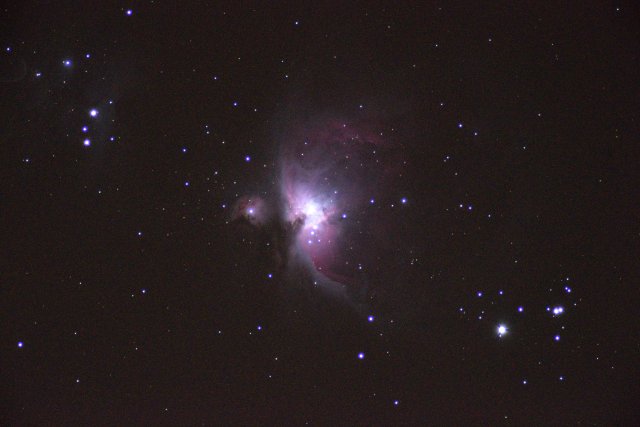
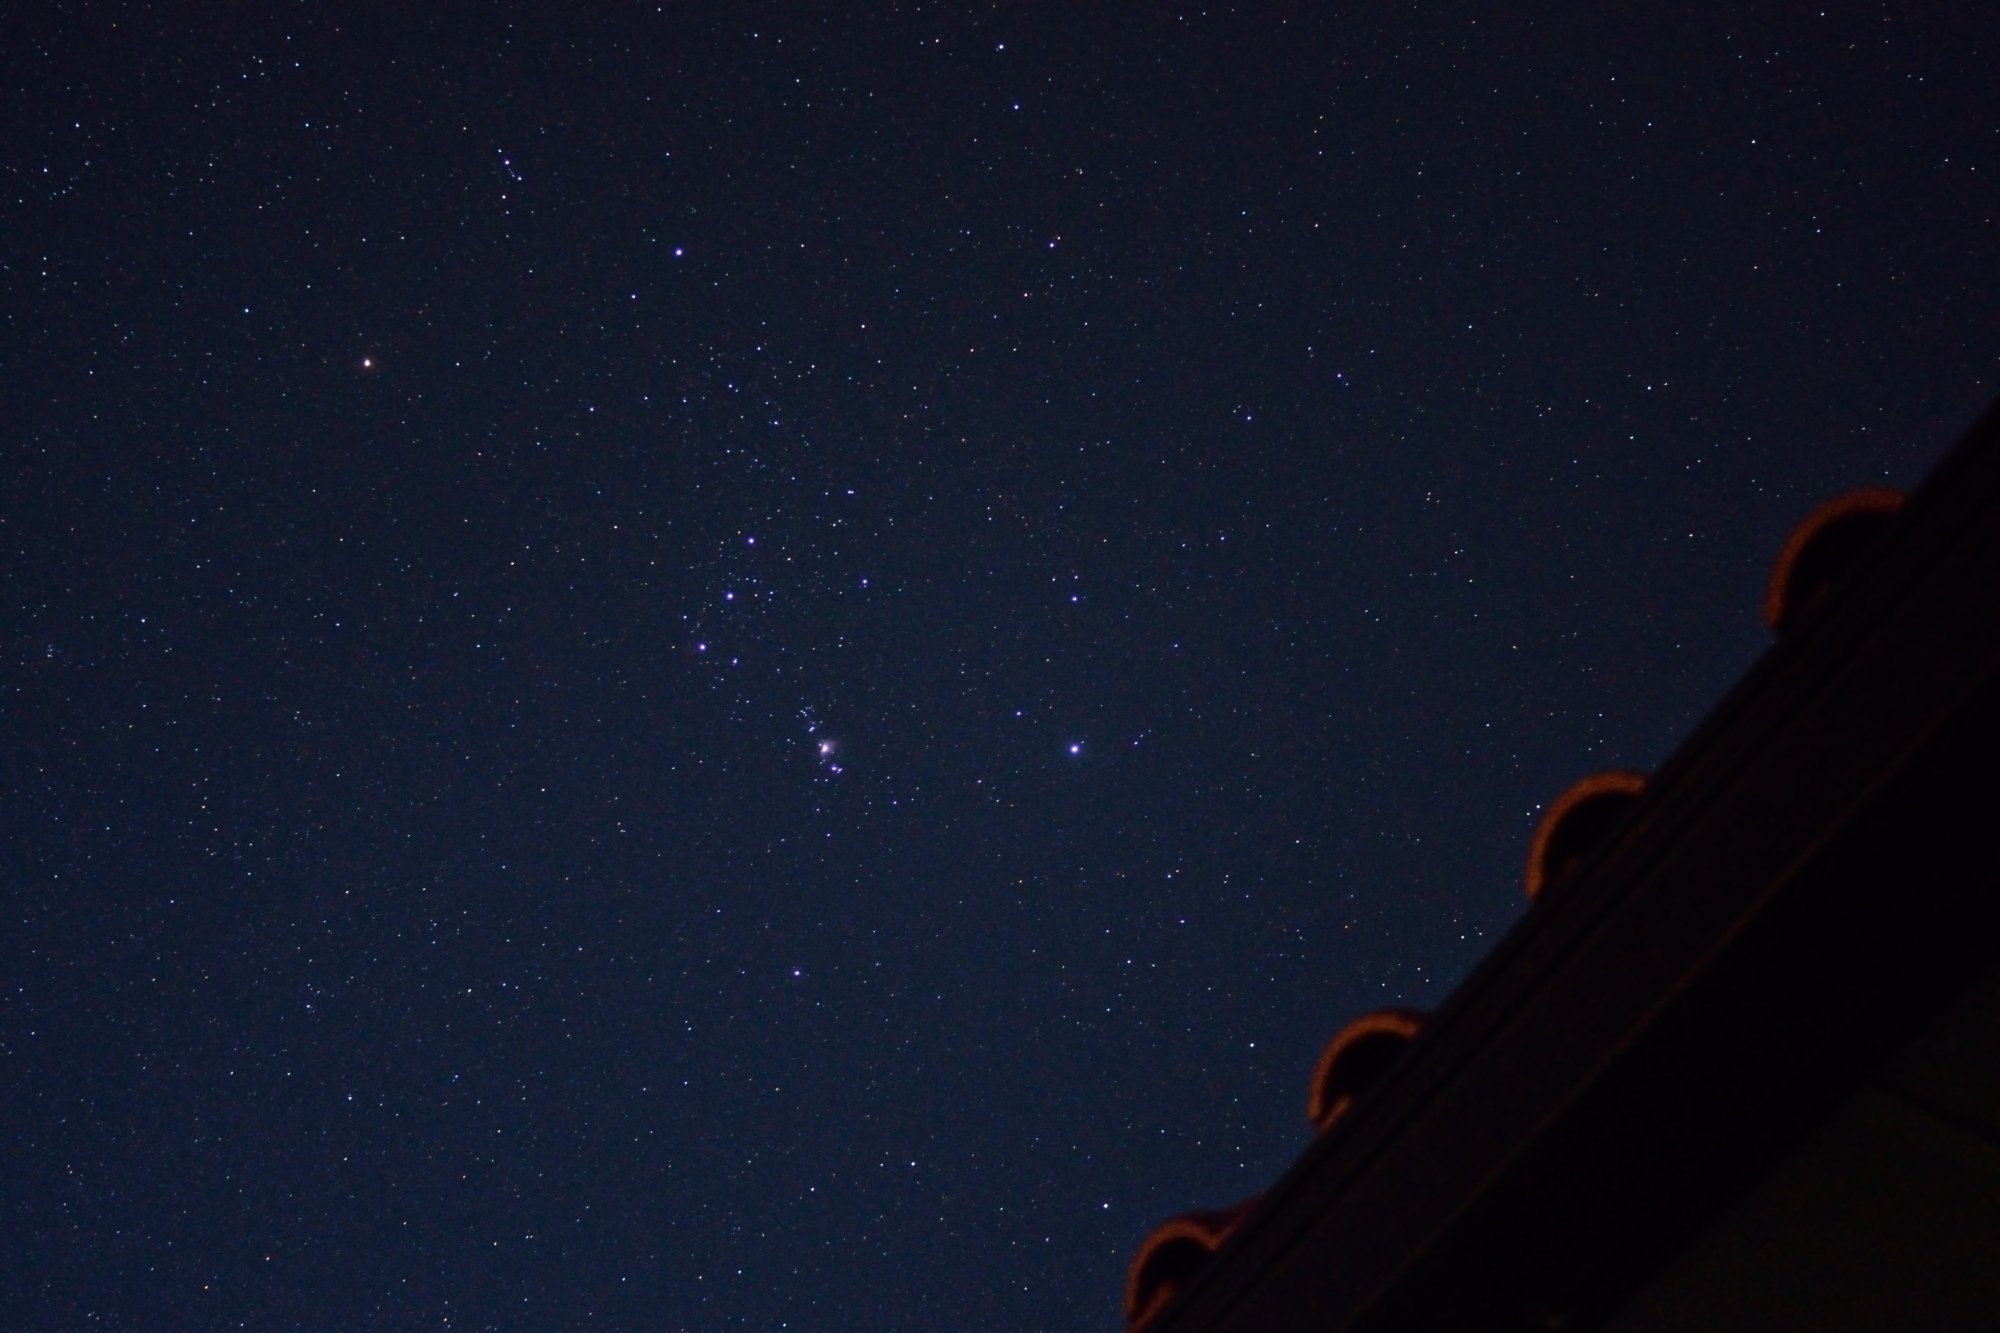 Orion at 13 seconds, ISO 2540, single frame using a Nikkor 28mm f2.8 lens (the author's D5300's first light in Sep 2018).
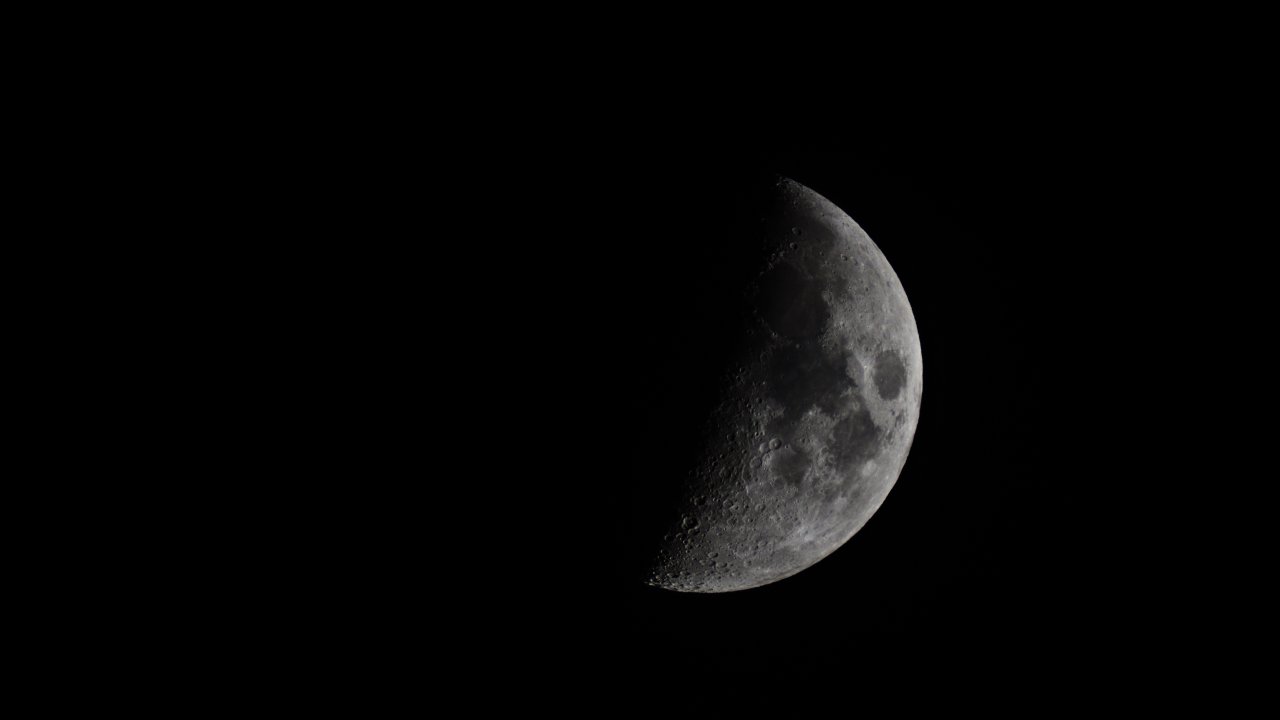
 The moon at 1/1000 seconds, ISO640, 6-inch newtonian FL 750mm, 2x barlow, 100 frames stacked.
Full screen
The moon at 1/1000 seconds, ISO640, 6-inch newtonian FL 750mm, 2x barlow, 100 frames stacked.
Full screen
Facts for Nerds
| Make | Nikon |
| Model | D5300 |
| Manufacturer | Sony |
| Technology | CMOS |
| Release | 17/10/2013 |
| Pixels | 4016 x 6016 |
| Sensor size | 23.5 x 15.6mm |
| Pixel size | 3.92µm |
| ADC | 14-bit |
| Q.E. | 55% |
| ISO | Measured ISO | Read Noise (e-) | Saturation (e-) | DR (stops) |
| 100 | 78 | 3.4 | 33925 | 13.3 |
| 200 | 157 | 2.7 | 16968 | 12.6 |
| 400 | 311 | 2.9 | 8764 | 11.6 |
| 800 | 622 | 2.7 | 4279 | 10.6 |
| 1600 | 1244 | 2.0 | 2097 | 10.0 |
| 3200 | 2483 | 2.3 | 1074 | 8.9 |
| 6400 | 5079 | 2.3 | 543 | 7.9 |
| 12800 | 9891 | 2.3 | 271 | 6.9 |
| 25600 | 19842 | 2.8 | 137 | 5.6 |
Settings
Limitations
Since Earth is rotating we need to compensate for motion blur by using exposure times as short as possible at high ISO sensitivity. The higher the ISO (and the longer the exposure) the more image noise (thermal signal) is generated especially at summer temperatures. However, the D5300 sensor features low noise further supported by selectable internally processed noise reduction functions to compensate for both extended exposure times and high ISO values. Exposure times must be so selected as to avoid notable star trails.
ISO and Exposure
Required ISO values depend on exposure time and sky glow in that desired results are best obtained by tests, while ISO6400 should not be exceeded (ISO800 @fn <= 1.4, ISO1600 @fn <= 2.0, ISO2000 @fn <= 2.8, else ISO3200 or 6400). Allowable exposure times until stars trail depend on the focal length of the lens, sensor size and object declination. Objects on or near the celestial equator (declination = 0°) draw the longest trails.
Astrophoto Calculators 🔗
Noteworthy
⚠ Mirror Flip and Shutter Shock
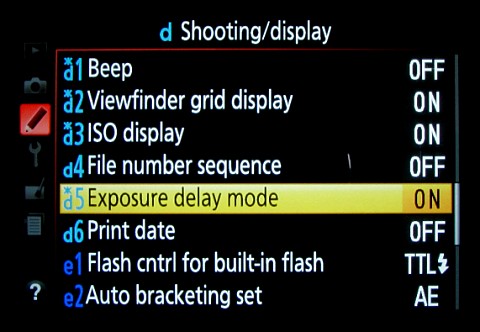
In spite of using the self-timer the image can blur as a result of vibration caused by shutter shock and the flipping mirror inside the camera. The vibration lasts about a second and magnifies with high ISO and a long focal length. To keep the mirror up set the D5300 to Live View (Lv), and/or, set "Exposure Delay Mode" in Custom Settings d5. Shutter shock can as well be compensated for by using a sturdy tripod and the famous black cardboard held in front of the lens.
⚠ Monitor Screen
The look and feel of your images differs a lot depending on which monitor you are using for viewing. An aged LCD won't deliver the brilliancy of a modern backlight LED monitor, including flat TVs. Projection to a large TV via, say, HDMI is highly rewarding especially in a dark room. A good choice can make your images look a lot better.
⚠ Field of View
The angular width (field of view) of an image is a function of chip size and focal length and can be calculated as:
FOV = 2 * Atan(X / (2 * FL)) * 57.3 [°]
whence X = horizontal chip size and FL the focal length, both in mm.
The width of the sensor in our D5300 is 23.5mm. With a 135mm lens attached we obtain an FOV of 10° while a 28mm lens will yield 45°, a 14mm lens 80°, and so forth.
Astrophoto Calculators 🔗
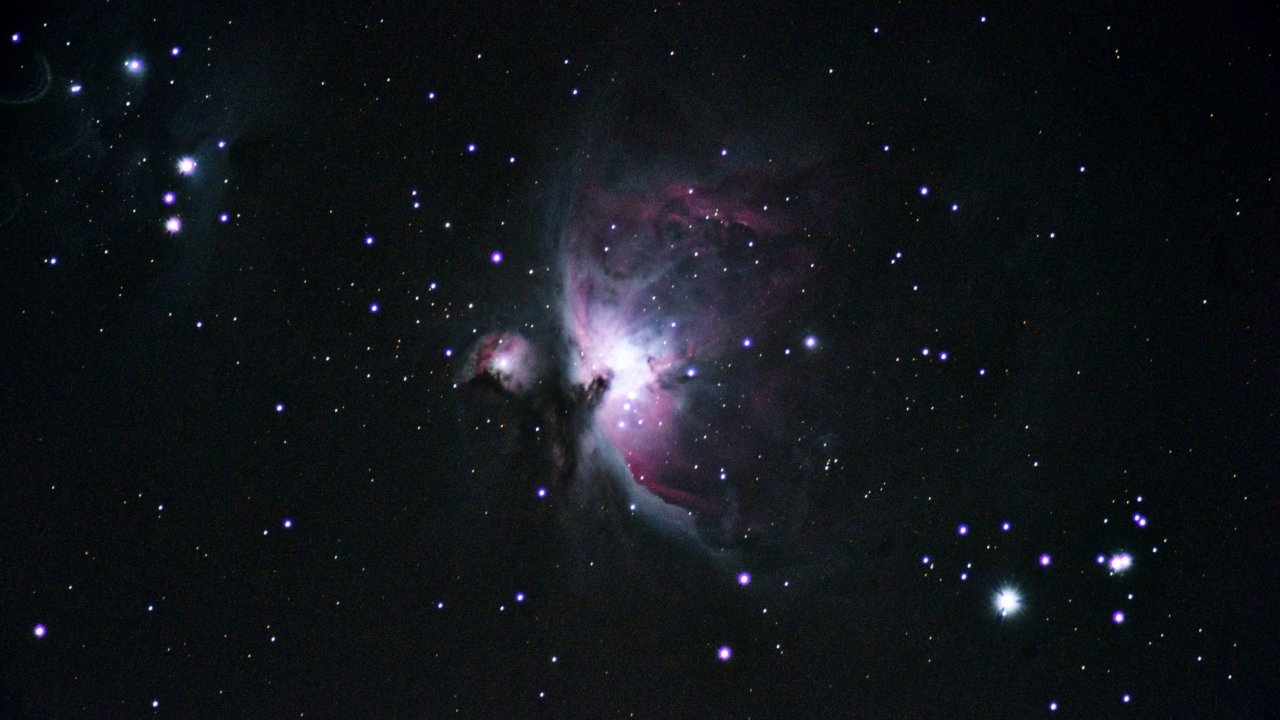
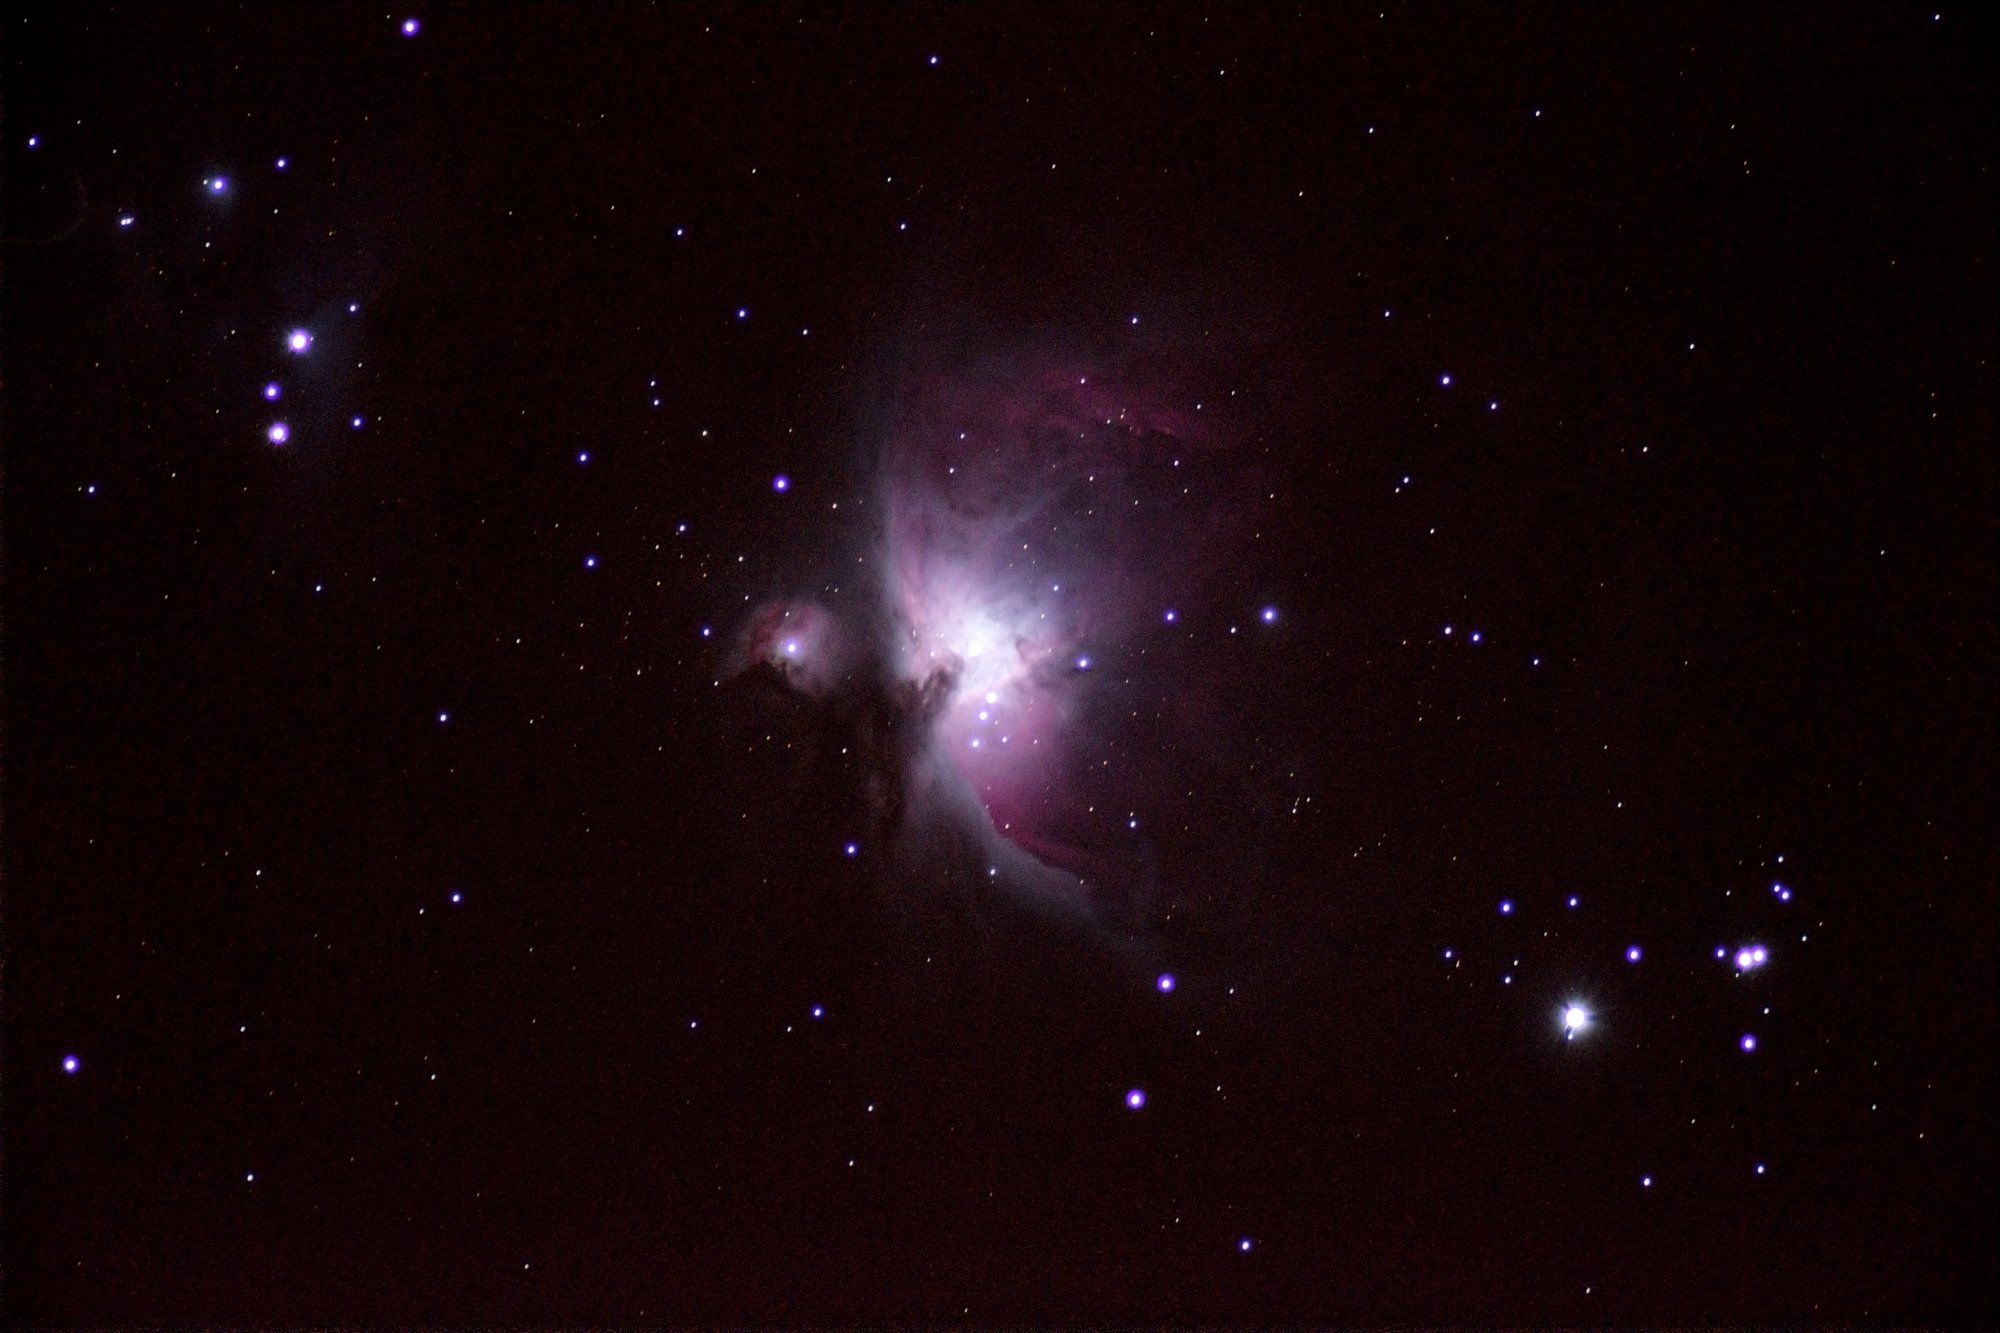
Right: The Orion Nebula, M42, captured with a Hα modified D5300 (IR-cut filter removed) and a Ø71mm/450mm refractor, 30 sec at ISO800, 40 light frames. Image FOV is 2.80 x 1.57°.

⚠ Hydrogen α Sensitivity
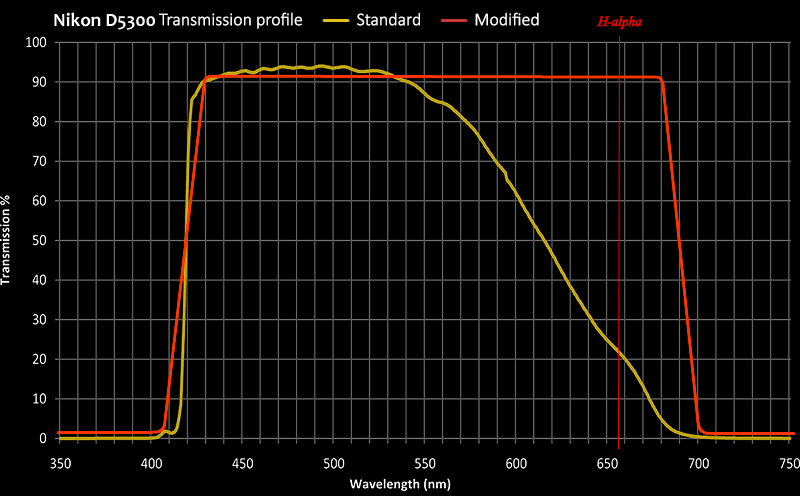
Unlike the Nikon D810a, the D5300 is not designed with astronomy in mind. While this is no major concern when imaging stars and galaxies, nebulae photographers may not be 100% content. Most nebulae emit in the Hα wavelength at 656.28nm. The unmodified D5300 receives just over 20% of this band while a retrofitted camera would receive over 90%, hence about 4.5 times more which makes a notable difference in contrast and detail in nebulae. Please check the internet for 'astro conversion' services.
⚠ Light Pollution Filter
The Red Intensifier Filter 🔗 by Kenko Tokina/Hoya is a true benefit for astrophotography under sky glow.
From Experience with Mishaps
- Create folders in your memory card and name them after your target objects such as "103M42_1" as a to-do list.
- Set the in-camera sharpness to a low level. Too much sharpness can amplify image noise.
- Sometimes you will need to increase the brightness of the LCD in order to focus on faint stars.
- An image can look overexposed on a bright LCD, but could actually need more exposure. Please always check the histogram.
- Note that the camera does not write f-number and focal length data into the image file when using a telescope or a manual-only lens.
Recommended Settings
Camera Settings
- Set camera to Manual mode, including focusing
- Select image quality NEF (RAW) + JPEG fine
- Set NEF (RAW) recording to 14-bit
- Enable exposure delay mode
- Set at least 5-seconds self-timer
- Select exposure time and ISO
- Set white balance to daylight or auto
- In-camera sharpening OFF at a high ISO
- Set the largest lens aperture (widest open)
- Select sRGB as color space
- Enable noise reduction (for single shots)
- Switch to Live View (Lv) and focus to infinity
- Disable image review
- Disable beep tones
Image Quality
Since we are dealing with noise, images should be available in best quality for efficient post-processing. JPEG is a lossy compression format, while RAW is lossless and offers the highest dynamic range as it contains the original (raw) sensor information that can be crucial when trying to capture faint details. The RAW format can be opened in Windows®10 media or with bundled software, both of which come with basic image processing functions.

The Milky Way
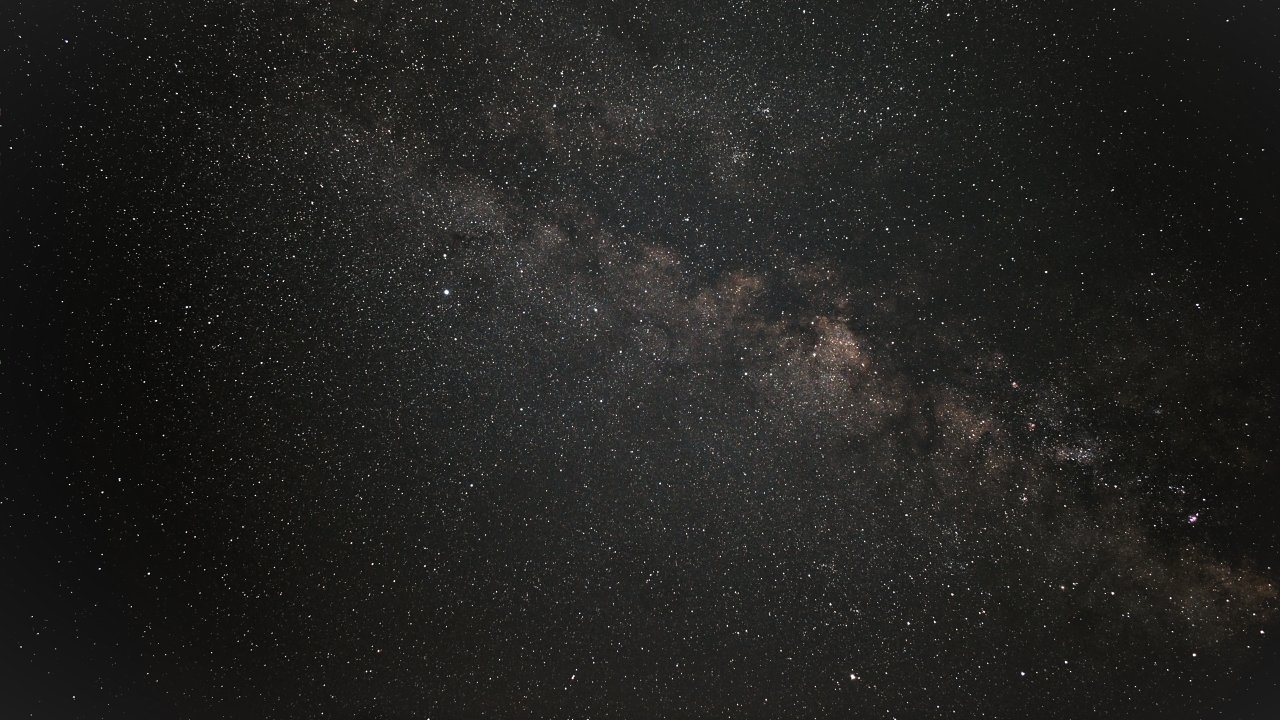
Stack of 10 exposures 30 seconds each at with a 18mm F3.5 lens at ISO 3200 and light pollution filter. In absence of the moon on May 4, 2019. Image FOV is about 65° wide. Tracked with Vixen Polarie. Full size image
Loupe Magnification
Applications
With a Telescope
The Moon - Nebulae - Galaxies
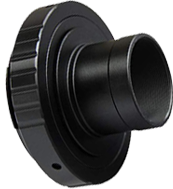
Lenses with a focal length of over 300 millimeters tend to be expensive. For astrophotography autofocus and other CPU controls are not required anyway in that a low cost (used) telescope and a simple DSLR T-ring adapter (pictured) is a true alternative. Since the adapter is threaded you can use your eyepiece filters, such as skyglow and IR blockers. Telescopes come with larger apertures thus collecting more light and contrast at a higher optical resolution. In comparison, say, a 300mm f6.3 telephoto lens has a clear aperture of 48mm, a standard mirror lens 500mm f8 sports 62mm, but is obstructed by its secondary mirror.
A scope with a focal length of, say, 1000mm will yield a FOV of 2.1° on a full frame sensor or 1.3° on an APS-C sensor. This is quite right for popular deepsky objects, such as the Orion Nebula and the half degree wide Earth moon. Wide field objects, such as the Rosette or North America nebulas require a shorter focal length, say 400mm (3.4°) to 600mm (2.2°) to embrace their full entity.
While tracking is not required for a good shot of the bright moon, all other objects will need to be tracked on an equatorial mount. High tracking precision is not required if you take several images, say, under one minute exposure to be stacked in software, in that you may not wish to spend a lot for a motorized mount.
The following samples have been produced with a Nikon D5300 in the prime focus of a Vixen A80Mf Ø80mm, 910mm, f11.4 refractor and stacked using "DeepSky Stacker" software with trimming in Photoshop 9. The original images are 1.5° wide, but sacrificed both a little width and height during stacking.
 M45, stack of 9 images 30 sec each @ISO 3200.
 Half moon, 1/125 sec @ISO 200.
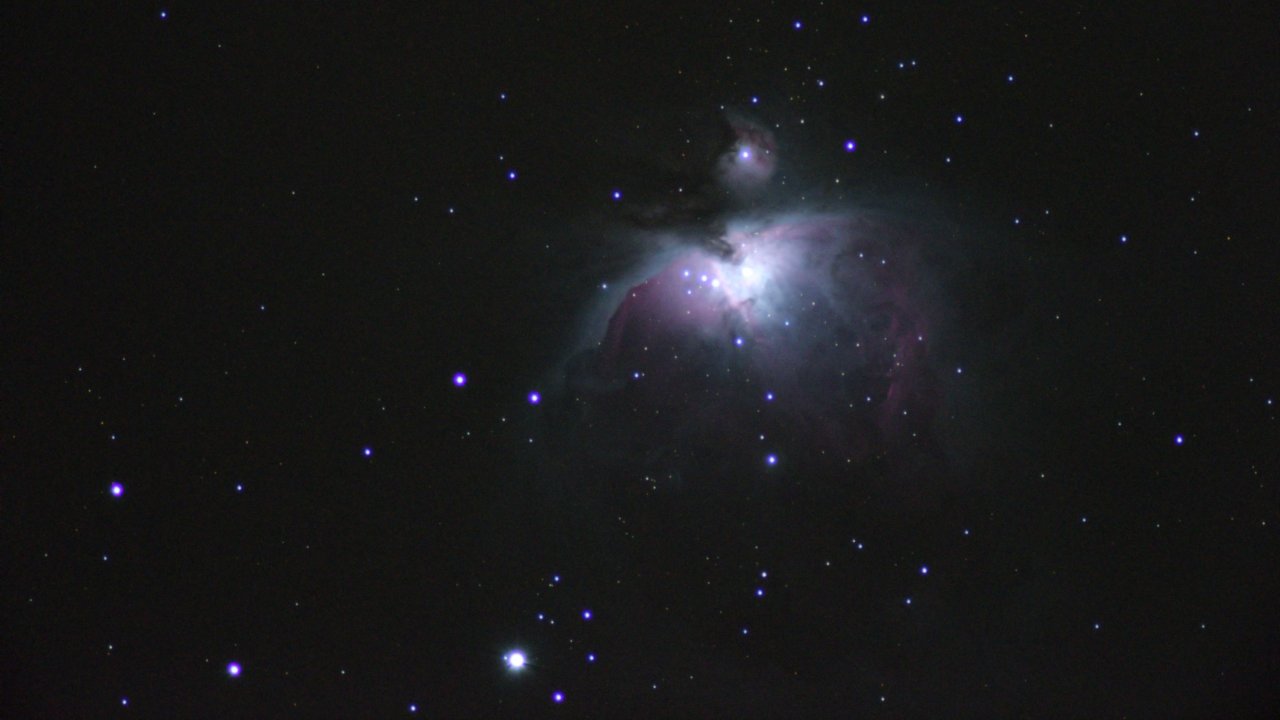
 M42, stack of 9 images 30 sec each @ISO 3200 and ISO 6400.
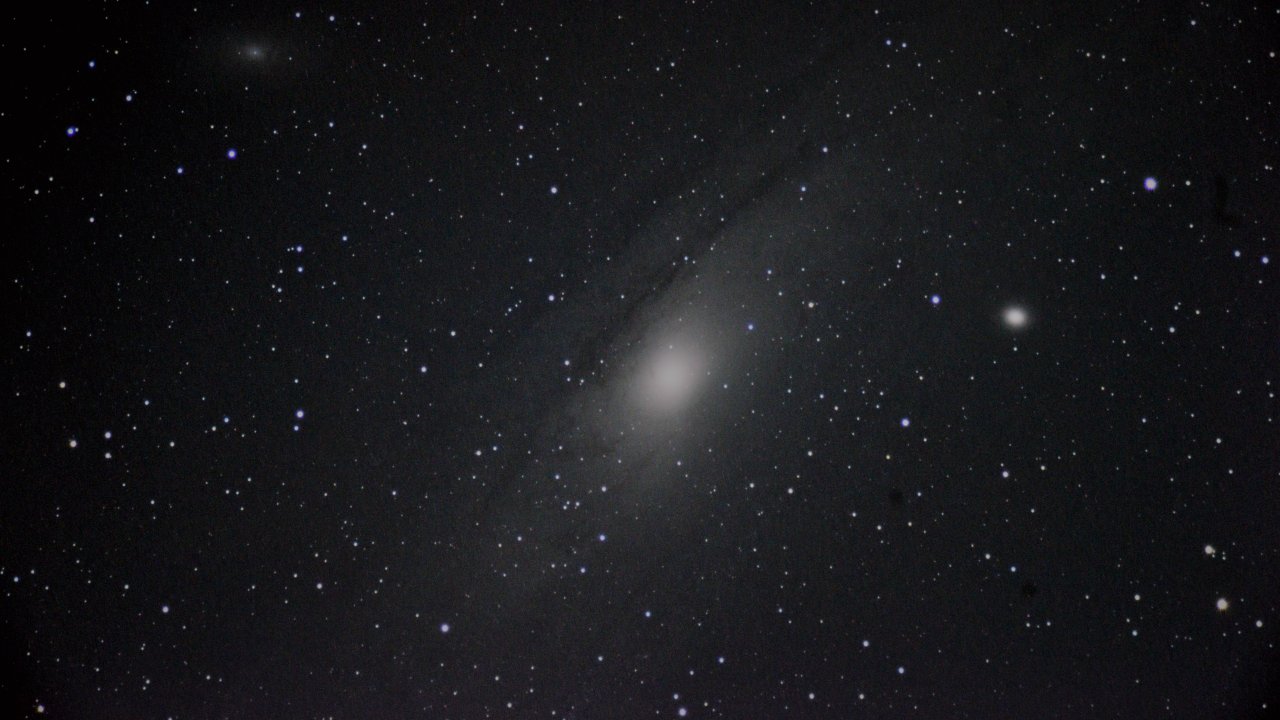 M31, stack of 19 images 30 sec each @ISO 3200 and ISO 6400.
Open Star Clusters
Bright star clusters are easy-to-capture deepsky objects, many of them truly jewels. Under suburban skies single shots 30 seconds at IS0 3200 with a skyglow filter can produce good looking images right out of the camera. To further reduce noise the sample images hereafter are stacks of six single frames using Deep Sky Stacker. Nikon D5300 at the prime focus of a tracked Vixen A80Mf refractor Ø80mm f11.4 with a skyglow filter in between. Post processing with [Level] and [Curve] in Photoshop. Setting a black point, say R20-G20-B20, to the background removes the tint of skyglow. The original images are 1.5° wide, but sacrificed both a little width and height during stacking.
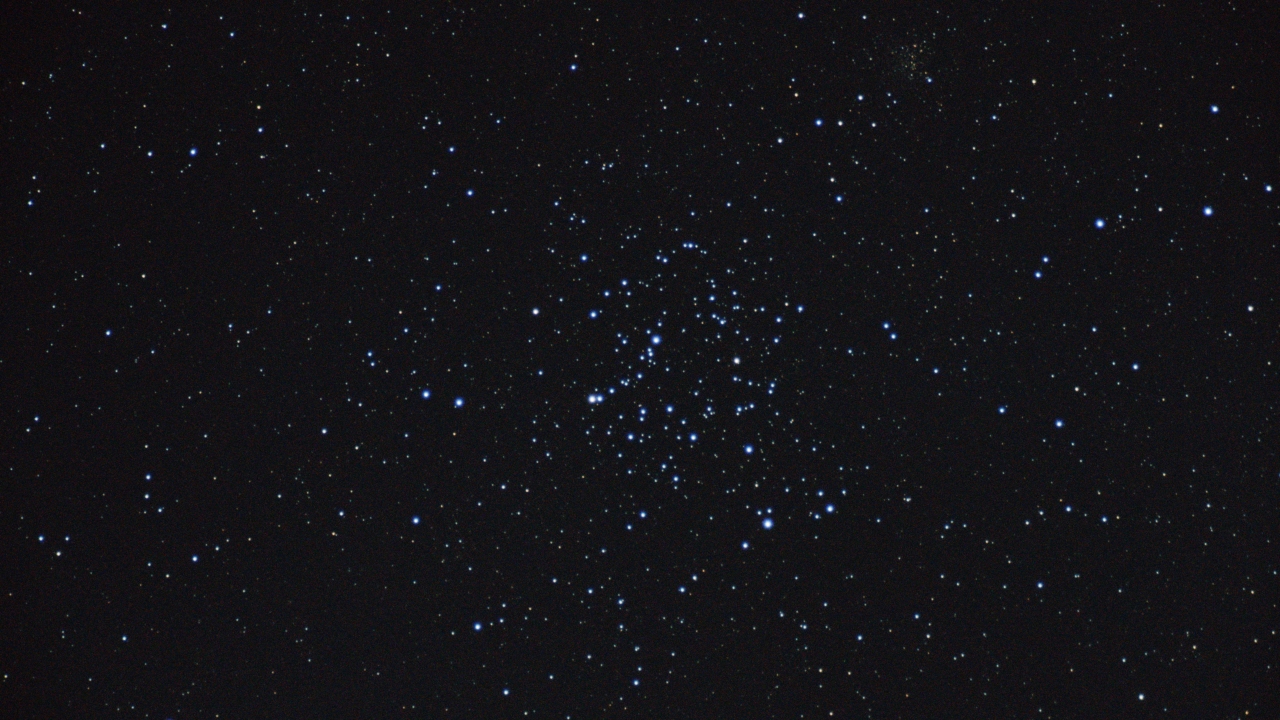 M35 in Gemini, stack of 6 images 30 sec each @ISO 3200.
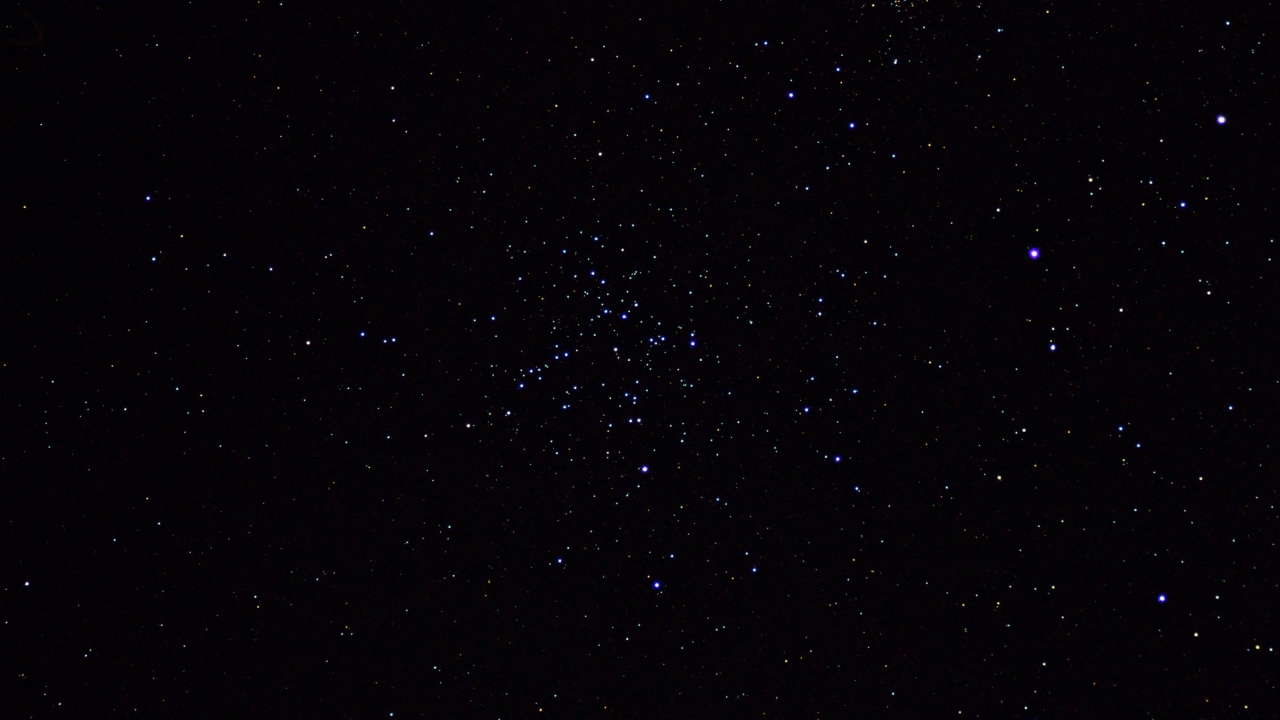 M38 in Auriga, stack of 6 images 30 sec each @ISO 3200.
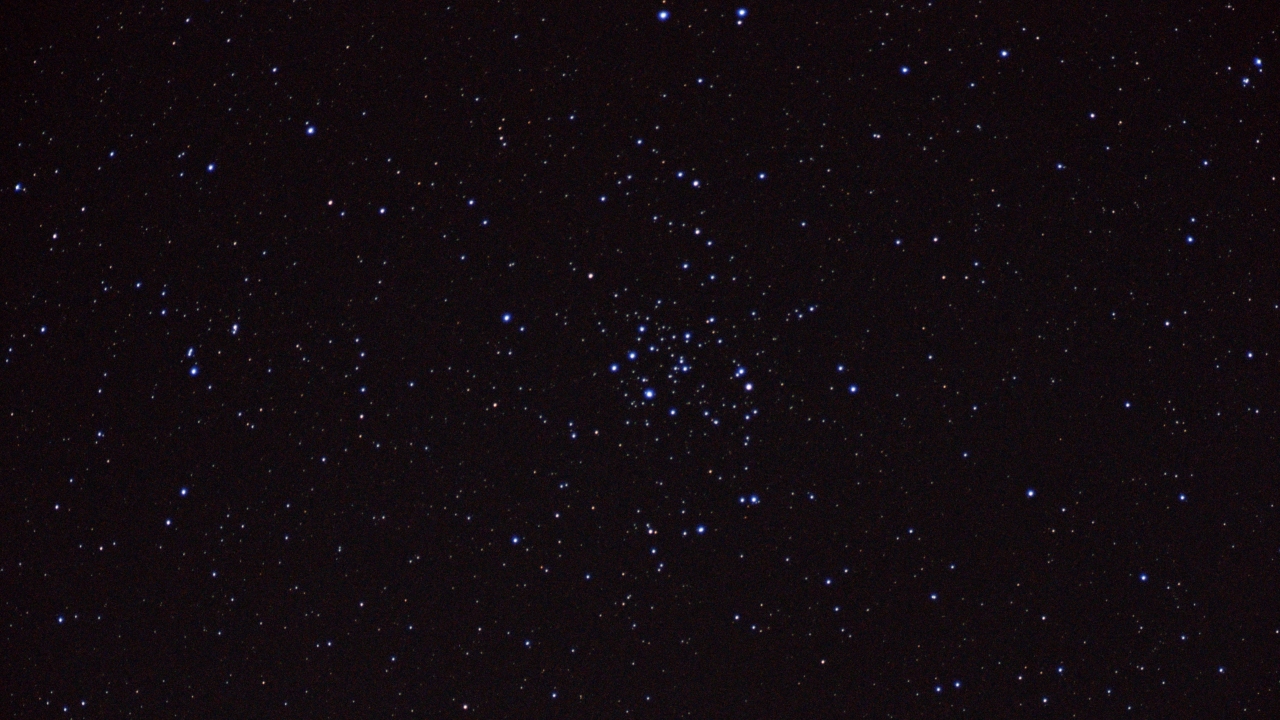 M50 in Monoceros, stack of 6 images 30 sec each @ISO 3200.
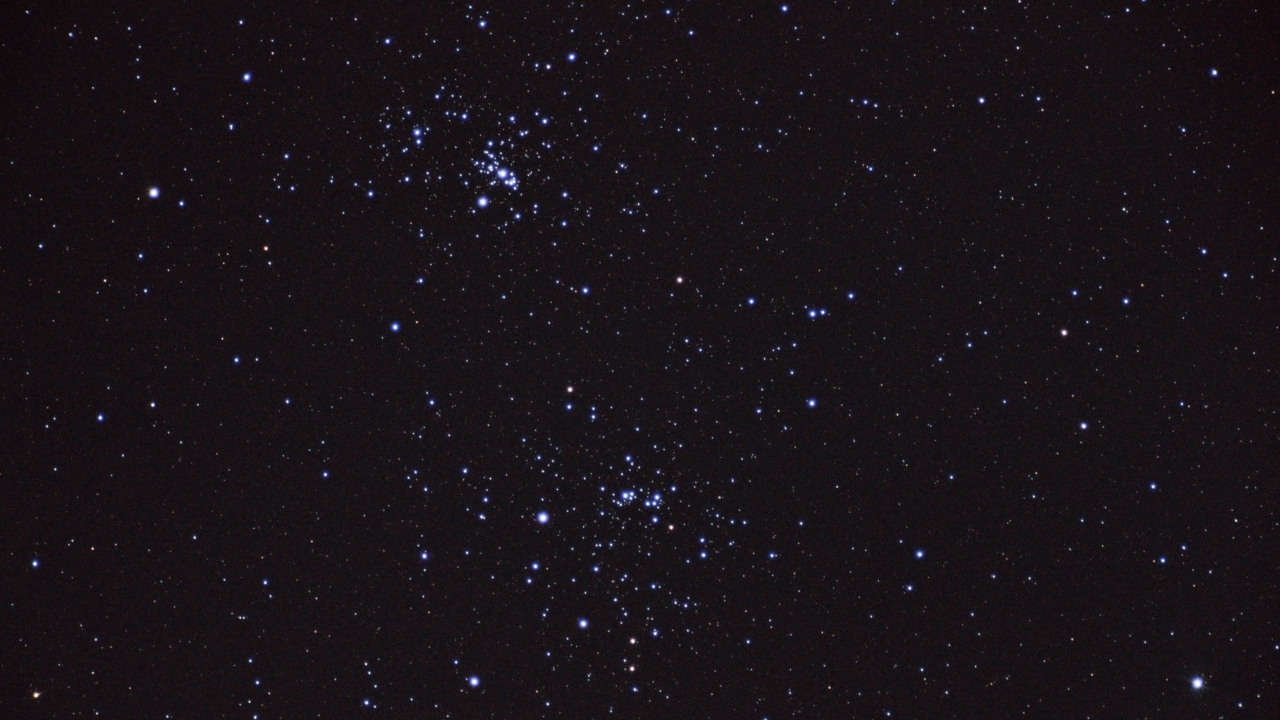 C14 in Perseus, stack of 6 images 30 sec each @ISO 3200.
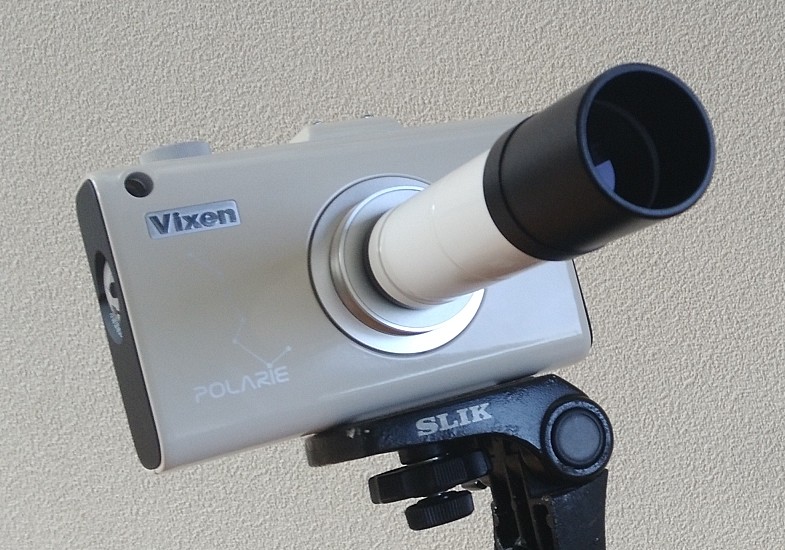
With a Mobile Tracker
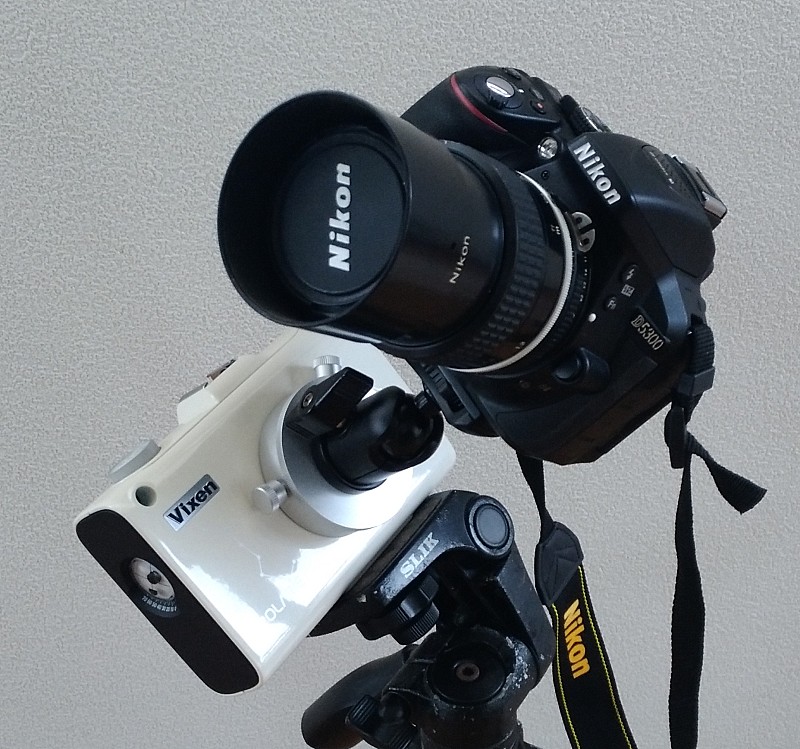
Polarie has a small peek hole spanning 9° for aligning the tracker with Polaris. Vixen offers a polar finder scope for another up to $300.00. Alternatively, a finder scope with crosshairs (6x30mm 7°) often coming with a small refractor can be used for alignment. Simply plug it in to the through hole (may need some tape for firm seating.)
There is a handful of other portable trackers in the market. We are using Vixen's Polarie for testing. Please see the Product Review.
First Test (Nov 25th. 2018)
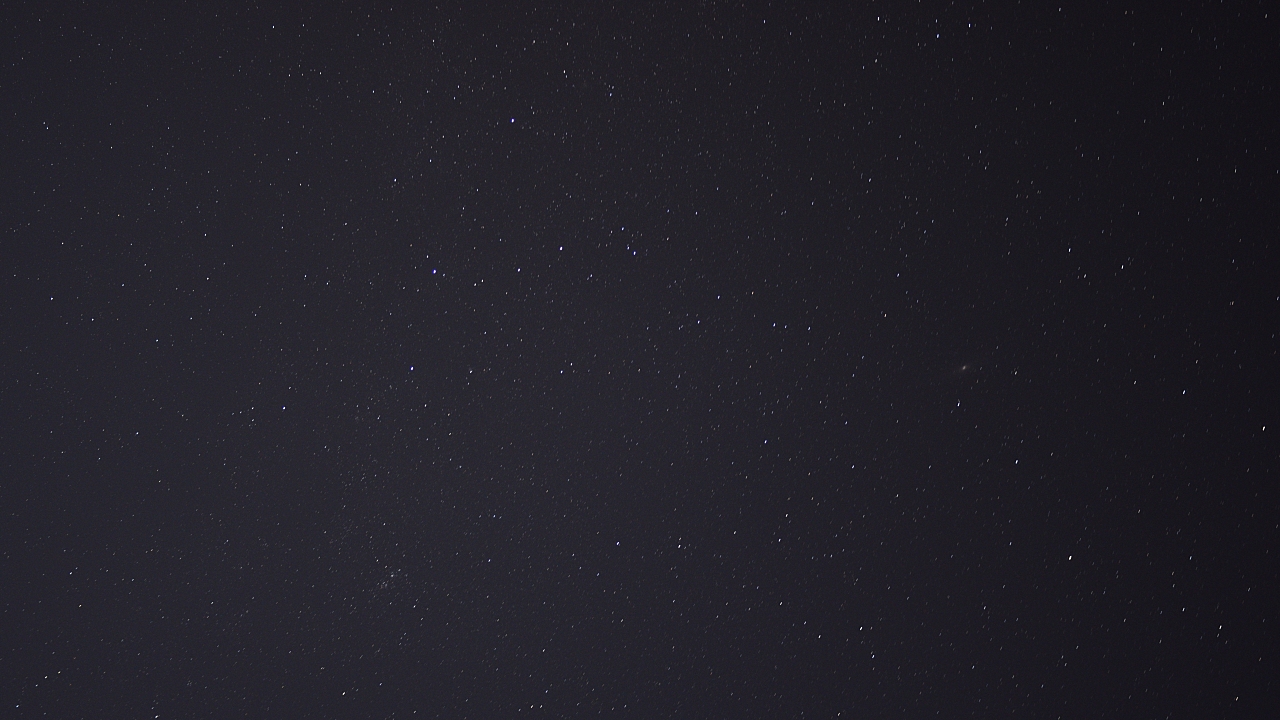
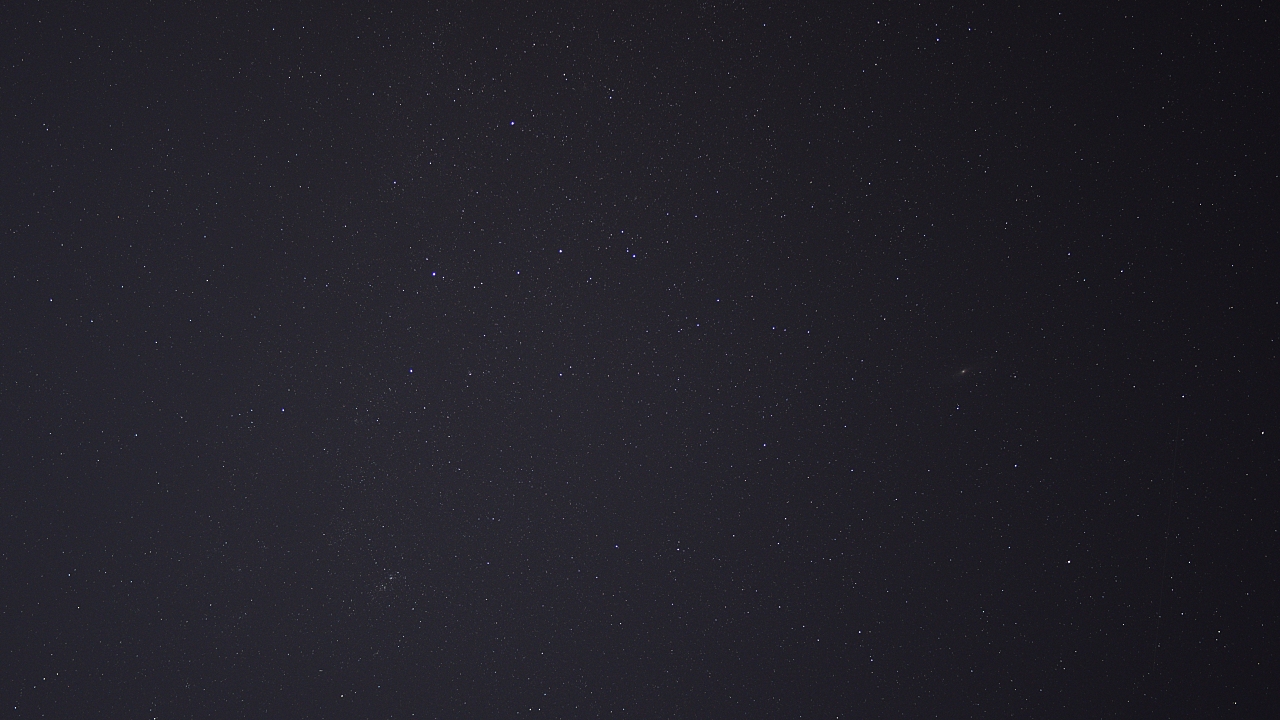
Star field images containing M31 at the upper right side taken without and with "Polarie" using the same 28mm f2.8 lens, 30 seconds exposures at ISO 400. The result does not require an explanation, except: "not bad at all"!
The slices from JPEG images are right out of the camera. The enlarged full FOV views (on click) showing Cassiopeia on the left side are processed with an unsharp mask. With a bit more 'polar alignment luck' the right image could show perfectly round stars.
Sample Images
Wide Fields - With a 135mm Fast Prime Lens
 A stack of 60 frames of NGC 2244 with Samyang 135mm lens, 25 sec at ISO800.
 A stack of 76 frames of M31 with Samyang 135mm lens, 25 sec at ISO800.
 A stack of 100 frames of M45 with Samyang 135mm lens, 30 sec at ISO2500.
 A stack of 45 frames of M42 with Samyang 135mm lens, 15 sec at ISO800.
Image Stacking
 M42, single frame 30 seconds @ISO 3200.
 M42, single frame 30 seconds @ISO 6400.
 M42, a stack of four frames (enlarge)
Nikon D5300, Vixen A80Mf (Ø80mm, fl=910mm, f11.4) refractor, processed with DeepSky Stacker and Photoshop CS2. All images are size reduced from originally 6000 x 4000 pixels. Move the mouse over an image to compare the noise levels. A stack of merely two images makes a notable difference. The advantage of stacking is obvious. As a rule of thumb, capture as many as possible since tracking errors or wind can spoil an image in that a few more can rescue a session. In addition some 15 dark frames (images taken with the same exposure settings and outside temperature as the light images but with a cap on the primary lens) help reduce noise. Dark frames capture the camera noise which the stacking software will subtract from the light frames.
The major purpose of stacking is for a better signal to noise ratio (SNR) which increases with the square root of the number of combined light frames irrespective of exposure time. For instance, when stacking two images the SNR increases by 1.414 (square root of 2), a stack of 10 light frames will improve the SNR by 3.16, a stack of 100 results in 10 times increased SNR. With less noise the image histogram can be stretched and curved much more thus revealing hidden colors and details.